- Old KB
- Control Portal
- Microsoft 365
-
1Stream Platform
- Admin User Functions
- Application Download
- AutoTask Integration
- BrightGauge
- Call Routing Features
- Call Tools
- ConnectWise Integration
- CrewHu
- CRM Management
- DropBox Integration
- End User Management
- Enterprise Portal
- HubSpot Integration
- Freshdesk Integration
- General Troubleshooting
- Hudu
- InfusionSoft Integration
- Insightly
- Liongard Integration
- Kaseya BMS
- MSPbots Integration
- OneDrive Integration
- Power BI
- Progressive Dialer
- Reports
- Salesforce
- ServiceNow Integration
- Signal
- SyncroMSP
- ZenDesk Integration
- Halo Integration
- Transcription and Analytics
-
Control Portal
- Auto Attendant Functionality
- BLF Keys
- bvoip Fundamentals
- Call Flow
- Call Queue
- Call Recordings
- Call Rules
- Desktop Application User Documentation
- Dial Codes
- DIDs
- Extensions
- Extension Tools
- FAQs
- Google Integration
- Microsoft 365
- Multifactor Authentication
- Phone Hours
- Settings
- Security
- Shop
- SIP Trunks
- SIPTrunk.com Partnership
- Storage
- System Notifications
- System Tools
- Troubleshooting Guides
- Users
- Webclient User Documentation
- Whitelabelling
- Zoho Integration
- WhatsApp Integration
-
Device Management & Provisioning
-
Nucleus for Microsoft Teams
-
1Stream Client
-
Messaging
New User with Microsoft 365
This article will walk you through the process of adding a new user to the bvoip phone system using Microsoft 365.
Not Using Microsoft 365?
See our New User Guide for detail on how to add a user without a Microsoft 365 tenant.
Create an Extension
There are two main options when it comes to making an extension. You can also skip this entirely if you just want to make an Admin user without an extension.
- If you just want users to have the next available extension, follow the guide Adding Users to the Microsoft 365 Integration.
- If you want users to have a specific extension number, you must first create the new extension with their User Principal Name as the Email field using Creating Phone Extensions, after which you can follow the above guide.
Check Extension Configuration and Licensing
Before you proceed, ensure that the extension is created the way you want it to be with all necessary features.
- Need call recordings? Check out Call Recording for Extensions.
- Using a physical phone? Ensure "Disallow use of extension outside the LAN" is unchecked.
- Ensure the extension is licensed properly using the 1Stream User License Tool.
Create the SSO User
Follow the two guides below to import the user into the Control portal, and then bind them to the newly created extension in the phone system.
If this user needs any permissions to manage phone systems or the Control portal itself, you can review the Instance Rights guide to set those up.
All Set!
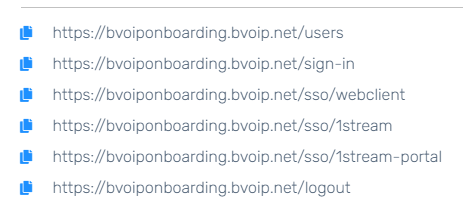
The user can now simply login to the various portals they have access to using the Microsoft SSO button.
If you need to know what URLs they can reach, you can go to System > Microsoft 365 > Add Account, and the bottom 6 URLs are for your company's login pages.