
This article will provide a walkthrough on the setup of the Halo integration with the 1Stream platform.
1Stream Level Feature Notice
This feature is available for only Core level 1Stream users and up. If you would like this feature to be available, then please reach out to your bvoip Sales Representative to upgrade user licensing.
Wanting to Use Halo without a Core License?
Please refer to our Screen Pop URL article to set this feature up.
Generating the Client ID and Client Secret in Halo
- Log into your HaloPSA account with an admin users permissions.
- Select Configurations.
- Scroll down and select Integrations.
- Select Halo PSA API.
- Next, click on the View Application button.
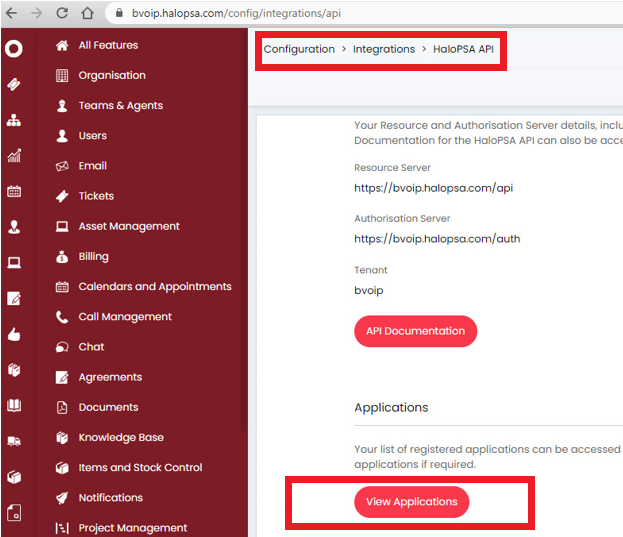
- The Applications listing page will load.
- Here, click on the New button in the upper right-hand corner.
- In the Application Name field, enter 1Stream.
- In the Authentication Method, select Client ID and Service (Services).
- On the Permissions tab, check the All option.
- Click Save.
- Once saved, the Client ID and Client Secret will be created.
- Save the Client ID and Client Secret.
Halo API User Notice
Be sure to create an agent that is also an API user to log in to make sure that the users list is visible.
Connecting the Halo Client ID and Client Secret into 1Stream
- Log into the 1Stream admin portal.
- Go to the Administration menu.

- Choose the Manage Organization option. The page will refresh.
- Scroll down to the Connected Account and CRM Settings section.
- Click on the green circled + to open the configuration pop-up.
- Select HaloPSA in the CRM Platform drop-down.

- Click the Save button. The pop-up will refresh with the connection configuration settings.
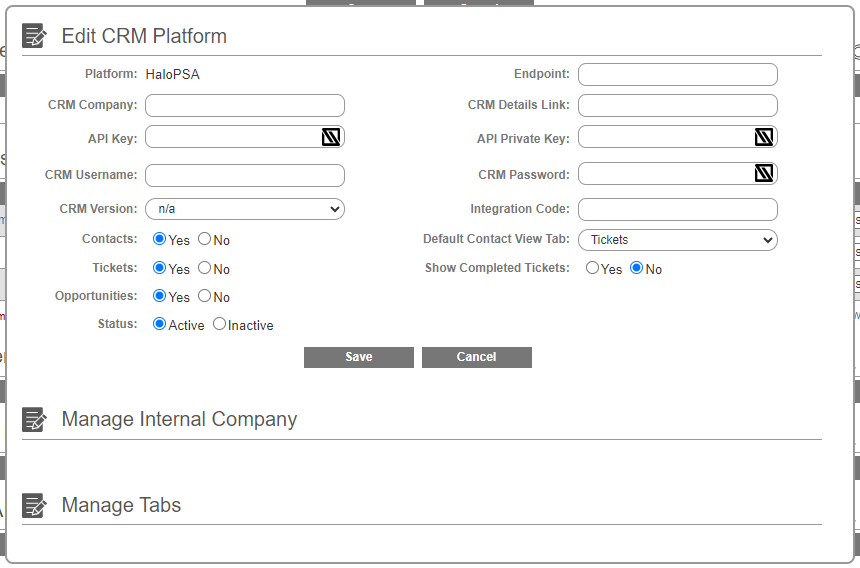
- In the CRM Company field, enter your HaloPSA Company ID.
- In the API Key field, enter the Client ID generated in Halo.
- In the API Private Key field, enter the Client Secret generated in Halo.
- In the Endpoint field, enter your Halo URL with api/ at the end of it.
NOTE: URL should look like https://xxxxxxx.halopsa.com/api/ - In the CRM Details link, enter your Halo URL.
NOTE: URL should look like https://xxxxxxx.halopsa.com/ - Click Save.
- Scroll Up to the 1Stream Administration section.
- Click on the Systems Check link.
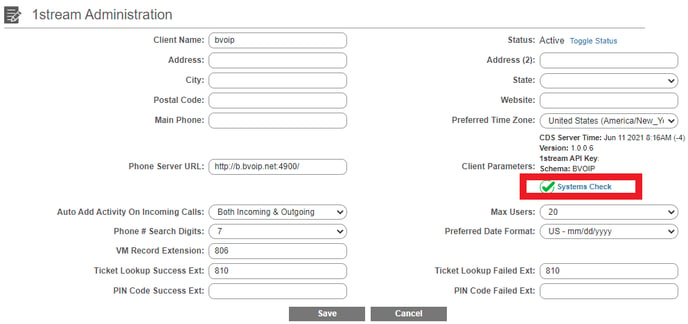
There will be a pop-up that appears and confirms if the connection was successful or if there was an issue that needed to be corrected. This will also pull in the user data from your Halo connection that will be reflected when users are added in the next section.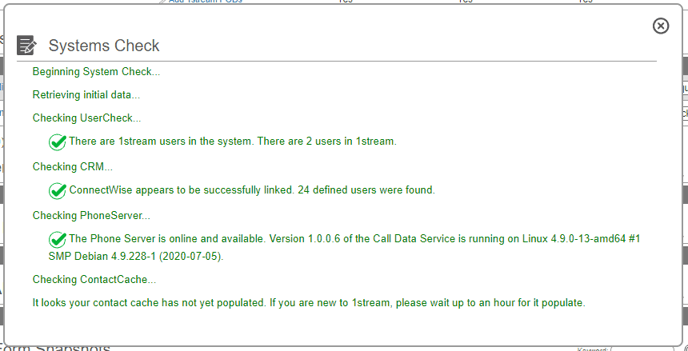
Mapping CRM Users
Once the CRM Connection to Halo has been completed, the users in 1Stream can be now mapped to their corresponding Halo user.
For instructions on how this can be done, please see our Mapping CRM Users article.
Not Seeing Halo Users?
If you are not seeing Halo users in the user drop down, make sure that the 1Stream user that was created is added to the departments and teams in Halo to ensure that they have that visibility. Additionally, ensure that multi-tenancy is enabled.