
- Old KB
- 1Stream Platform
- ConnectWise Integration
-
1Stream Platform
- Admin User Functions
- Application Download
- AutoTask Integration
- BrightGauge
- Call Routing Features
- Call Tools
- ConnectWise Integration
- CrewHu
- CRM Management
- DropBox Integration
- End User Management
- Enterprise Portal
- HubSpot Integration
- Freshdesk Integration
- General Troubleshooting
- Hudu
- InfusionSoft Integration
- Insightly
- Liongard Integration
- Kaseya BMS
- MSPbots Integration
- OneDrive Integration
- Power BI
- Progressive Dialer
- Reports
- Salesforce
- ServiceNow Integration
- Signal
- SyncroMSP
- ZenDesk Integration
- Halo Integration
- Transcription and Analytics
-
Control Portal
- Auto Attendant Functionality
- BLF Keys
- bvoip Fundamentals
- Call Flow
- Call Queue
- Call Recordings
- Call Rules
- Desktop Application User Documentation
- Dial Codes
- DIDs
- Extensions
- Extension Tools
- FAQs
- Google Integration
- Microsoft 365
- Multifactor Authentication
- Phone Hours
- Settings
- Security
- Shop
- SIP Trunks
- SIPTrunk.com Partnership
- Storage
- System Notifications
- System Tools
- Troubleshooting Guides
- Users
- Webclient User Documentation
- Whitelabelling
- Zoho Integration
- WhatsApp Integration
-
Device Management & Provisioning
-
Nucleus for Microsoft Teams
-
1Stream Client
-
Messaging
ConnectWise Security PIN Setup
This article will walkthrough the process of setting up a client security PIN in ConnectWise to work for call routing.
1Stream Level Feature Notice
This feature part of the PIN Code Route 1Stream feature that is available for only Engage level 1Stream users and up. If you would like this feature to be available, then please reach out to your bvoip Sales Representative to upgrade user licensing.
Setting up the Security PIN in ConnectWise
- Log into ConnectWise.
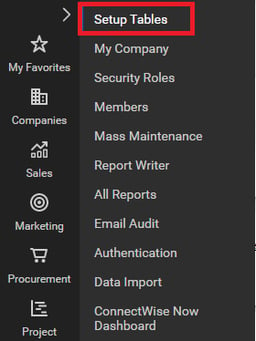
- Click on the System icon.

- Go to the Setup Tables option.
- Scroll to the Table column.

- Search for Custom Field.
- Click on the Custom Field option that appears.
- Scroll to the Pod Description column.
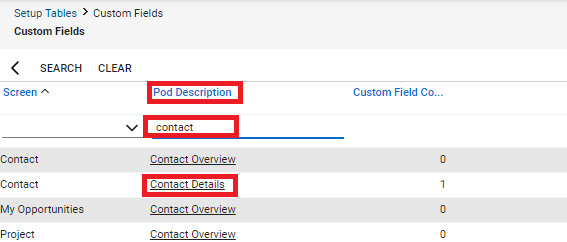
- Locate and click on the Contact Details option.
- Click the plus button to open the Custom Fields section. The Add New Custom Field section will appear.
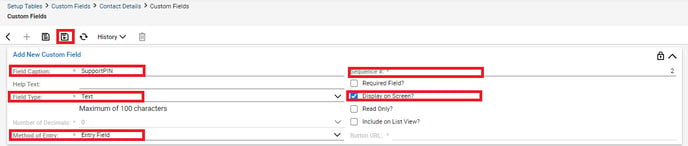
- In the Field Caption field, input the text SupportPIN.
- Choose the Text option from the Field Type drop-down.
- Choose the Entry Field option from the Method of Entry drop-down.
- In the Sequence # field, leave it as the current number (unless re-ordering this field in regards to other custom fields.)
- Enable the Display on Screen? option.
- Click the Save and Close button.
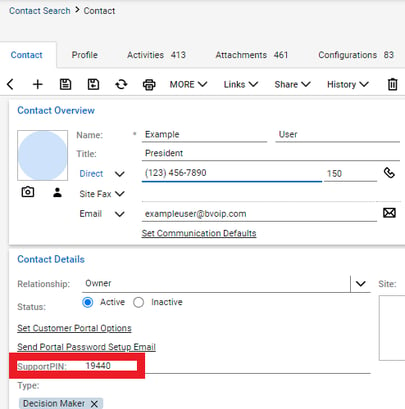
Once the PIN field is setup, it will then reflect in all ConnectWise users so that Security PIN Routing can be setup as client add PIN numbers to their accounts.