
- Old KB
- Control Portal
- Call Rules
-
1Stream Platform
- Admin User Functions
- Application Download
- AutoTask Integration
- BrightGauge
- Call Routing Features
- Call Tools
- ConnectWise Integration
- CrewHu
- CRM Management
- DropBox Integration
- End User Management
- Enterprise Portal
- HubSpot Integration
- Freshdesk Integration
- General Troubleshooting
- Hudu
- InfusionSoft Integration
- Insightly
- Liongard Integration
- Kaseya BMS
- MSPbots Integration
- OneDrive Integration
- Power BI
- Progressive Dialer
- Reports
- Salesforce
- ServiceNow Integration
- Signal
- SyncroMSP
- ZenDesk Integration
- Halo Integration
- Transcription and Analytics
-
Control Portal
- Auto Attendant Functionality
- BLF Keys
- bvoip Fundamentals
- Call Flow
- Call Queue
- Call Recordings
- Call Rules
- Desktop Application User Documentation
- Dial Codes
- DIDs
- Extensions
- Extension Tools
- FAQs
- Google Integration
- Microsoft 365
- Multifactor Authentication
- Phone Hours
- Settings
- Security
- Shop
- SIP Trunks
- SIPTrunk.com Partnership
- Storage
- System Notifications
- System Tools
- Troubleshooting Guides
- Users
- Webclient User Documentation
- Whitelabelling
- Zoho Integration
- WhatsApp Integration
-
Device Management & Provisioning
-
Nucleus for Microsoft Teams
-
1Stream Client
-
Messaging
The DID Helper Tool
This article will provide a walkthrough on using the DID Helper Tool in the bvoip phone system.
What is the DID Helper Tool?
The DID Helper Tool helps with adding DIDs in bulk into the Inbound Rules section as well as in the SIP Trunk section of the phone system.
Where to Find It
The DID Helper Tool can be found in the bvoip phone system.
- Log into the bvoip phone system.
- Click on the Call Flow drop-down menu.
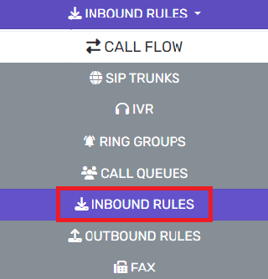
- Go to the Inbound Rules subsection.

Using the DID Helper Tool
- Click on the DID Helper button. The page will refresh.
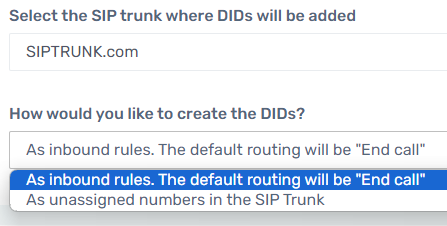
- In the Select the SIP Trunk Where DIDs will be Added drop-down, select the desired trunk.
- In the How would you like to create the DIDs? drop-down, select the desired option.
- Click on the Next button. The Adding DIDs in bulk section will appear.

- In the text box, add the desired DIDs to be added.

- In the text box beside each DID, a name can be added to help differentiate.
- Click the Complete text. A pop up will appear to confirm the numbers as they are added.

- Select the Close button to have the inbound rules screen re-appear.
The DIDs will have been simultaneously be added into the Inbound Rules and SIP Trunk sections in the phone system. They also will need to be routed individually by clicking on the edit button and following the steps listed in the Adding Inbound Rules article.