-
1Stream Platform
- Admin User Functions
- Application Download
- AutoTask Integration
- BrightGauge
- Call Routing Features
- Call Tools
- ConnectWise Integration
- CrewHu
- CRM Management
- DropBox Integration
- End User Management
- Enterprise Portal
- HubSpot Integration
- Freshdesk Integration
- General Troubleshooting
- Hudu
- InfusionSoft Integration
- Insightly
- Liongard Integration
- Kaseya BMS
- MSPbots Integration
- OneDrive Integration
- Power BI
- Progressive Dialer
- Reports
- Salesforce
- ServiceNow Integration
- Signal
- SyncroMSP
- ZenDesk Integration
- Halo Integration
- Transcription and Analytics
-
Control Portal
- Auto Attendant Functionality
- BLF Keys
- bvoip Fundamentals
- Call Flow
- Call Queue
- Call Recordings
- Call Rules
- Desktop Application User Documentation
- Dial Codes
- DIDs
- Extensions
- Extension Tools
- FAQs
- Google Integration
- Microsoft 365
- Multifactor Authentication
- Phone Hours
- Settings
- Security
- Shop
- SIP Trunks
- SIPTrunk.com Partnership
- Storage
- System Notifications
- System Tools
- Troubleshooting Guides
- Users
- Webclient User Documentation
- Whitelabelling
- Zoho Integration
- WhatsApp Integration
-
Device Management & Provisioning
-
Nucleus for Microsoft Teams
-
1Stream Client
-
Messaging
SMS Blasts via Textable
This article will provide a walkthrough on using SMS powered blasts via Textable.
Textable Blasts
- Log into Textable.

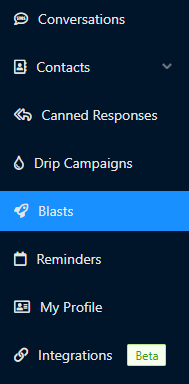
- Go to the Blasts Menu.
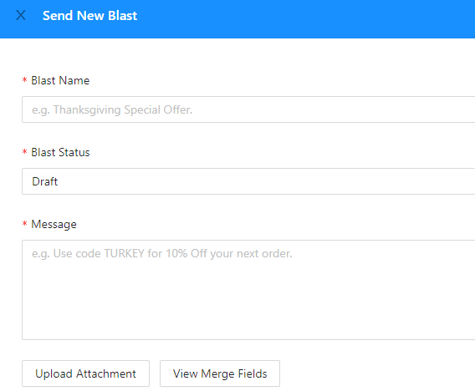
- Click on the Send New Blast button. A side window will appear to help configure the blast.

- In the Blast Name field, input a desired name.

- In the Blast Status drop-down, select the desired scheduling time.
- Draft will save the Blast until triggered.
- Send Now will initiate the Blast once Saved.
- Schedule will allow the Blast to be set for a time and date in the future.
- In the Message textbox, input the desired message. If you have a pre-written message file to import, click on the Upload Attachment button.
- In the Current Footer textbox, edit the footer if desired.

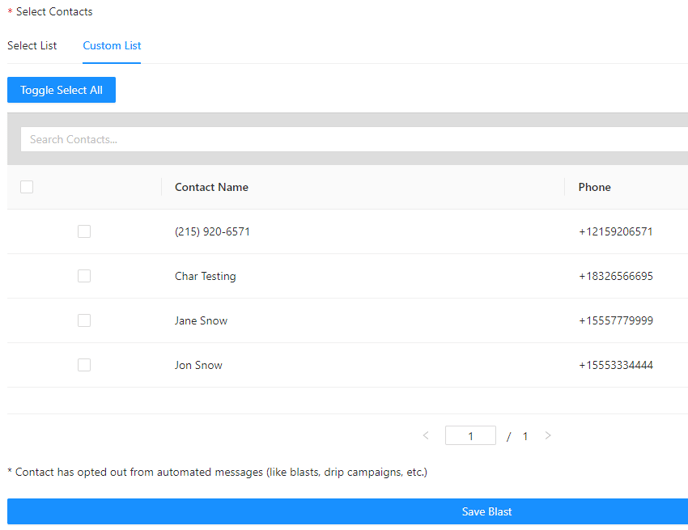
- In the Select Contact section, determine if there will be a set contact list to be used or a custom list. If custom, select your contacts.

- Click on the Save Blast button.
The Blast will then be saved or sent out, depending on what was selected in step 5. Blasts can be edited by being clicked on and editing accordingly.
