
- Old KB
- Control Portal
- Auto Attendant Functionality
-
1Stream Platform
- Admin User Functions
- Application Download
- AutoTask Integration
- BrightGauge
- Call Routing Features
- Call Tools
- ConnectWise Integration
- CrewHu
- CRM Management
- DropBox Integration
- End User Management
- Enterprise Portal
- HubSpot Integration
- Freshdesk Integration
- General Troubleshooting
- Hudu
- InfusionSoft Integration
- Insightly
- Liongard Integration
- Kaseya BMS
- MSPbots Integration
- OneDrive Integration
- Power BI
- Progressive Dialer
- Reports
- Salesforce
- ServiceNow Integration
- Signal
- SyncroMSP
- ZenDesk Integration
- Halo Integration
- Transcription and Analytics
-
Control Portal
- Auto Attendant Functionality
- BLF Keys
- bvoip Fundamentals
- Call Flow
- Call Queue
- Call Recordings
- Call Rules
- Desktop Application User Documentation
- Dial Codes
- DIDs
- Extensions
- Extension Tools
- FAQs
- Google Integration
- Microsoft 365
- Multifactor Authentication
- Phone Hours
- Settings
- Security
- Shop
- SIP Trunks
- SIPTrunk.com Partnership
- Storage
- System Notifications
- System Tools
- Troubleshooting Guides
- Users
- Webclient User Documentation
- Whitelabelling
- Zoho Integration
- WhatsApp Integration
-
Device Management & Provisioning
-
Nucleus for Microsoft Teams
-
1Stream Client
-
Messaging
Setting up the IVR Function
This article will provide a walkthrough on setting up the auto-attendant in the bvoip phone system.
What is an IVR?
IVR stands for Interactive Voice Response. This feature in the phone system is set up so that you can have an interactive menu for callers to be funneled to their desired destination. The other term used for this function is an Auto Attendant or Digital Receptionist.
Configuring the IVR
- Log into the bvoip phone system.
- Click on Call Flow drop-down menu.
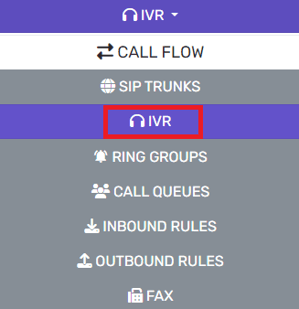
- Go to the IVR subsection.
- Click on Add+ button. The screen will refresh to set up the IVR.

- Go to the General section.
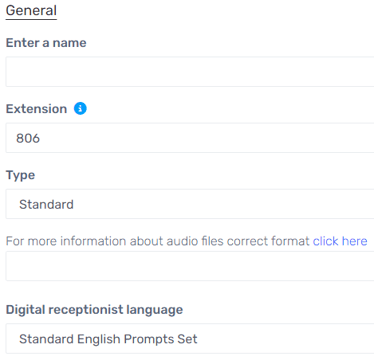
- In the Name textbox, add the desired name such as InOfficeHours or something similar.
- Under Intro Prompt Setting, choose the desired prompt file from the drop-down. If a file is needs to be recorded or uploaded, it can be done using the buttons next to the drop-down.
- Go to the Menu Options section.

- For each key number, select a desired Menu Option from the drop-down if there will be menu options. Some options will have a secondary drop-down appear under the Destination column.
- In the Destination drop-down, either select the desired destination or audio file.
- Scroll down to the Destination For Invalid or No DTMF Input section.
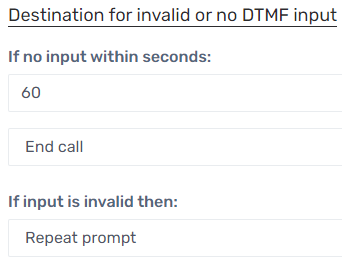
- In the If No Input Within Seconds field, enter the amount time needed before action is taken.
- In the drop-down below the If No Input Within Seconds field, select the action to be taken once the designated time has elapsed.
- In the If Input is Invalid drop-down, select the action to be taken.
- Click the Save button.
Further Action Needed
Once the IVR has been setup, it will be able to be used as a destination for Inbound Rules and nested into other IVRs.