
- Old KB
- Control Portal
- Desktop Application User Documentation
-
1Stream Platform
- Admin User Functions
- Application Download
- AutoTask Integration
- BrightGauge
- Call Routing Features
- Call Tools
- ConnectWise Integration
- CrewHu
- CRM Management
- DropBox Integration
- End User Management
- Enterprise Portal
- HubSpot Integration
- Freshdesk Integration
- General Troubleshooting
- Hudu
- InfusionSoft Integration
- Insightly
- Liongard Integration
- Kaseya BMS
- MSPbots Integration
- OneDrive Integration
- Power BI
- Progressive Dialer
- Reports
- Salesforce
- ServiceNow Integration
- Signal
- SyncroMSP
- ZenDesk Integration
- Halo Integration
- Transcription and Analytics
-
Control Portal
- Auto Attendant Functionality
- BLF Keys
- bvoip Fundamentals
- Call Flow
- Call Queue
- Call Recordings
- Call Rules
- Desktop Application User Documentation
- Dial Codes
- DIDs
- Extensions
- Extension Tools
- FAQs
- Google Integration
- Microsoft 365
- Multifactor Authentication
- Phone Hours
- Settings
- Security
- Shop
- SIP Trunks
- SIPTrunk.com Partnership
- Storage
- System Notifications
- System Tools
- Troubleshooting Guides
- Users
- Webclient User Documentation
- Whitelabelling
- Zoho Integration
- WhatsApp Integration
-
Device Management & Provisioning
-
Nucleus for Microsoft Teams
-
1Stream Client
-
Messaging
Setting Up the bvoip Phone System Desktop Application
This article will provide a walkthrough on how to setup the bvoip phone system desktop application.
Where to Find the Details
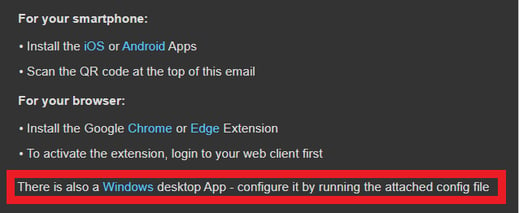
Setting up the phone system desktop application details will be included in every extension's welcome email. The configuration file for the setup is included as an attachment to the extension welcome email.
What About Bulk User Setup?
If you wish to setup users in a batch, please refer to our Phone System Mass Deployment article.
How to Setup the Desktop Application
- Open your extension welcome email.
- Scroll down to the bottom of the email.
- Click on the Windows hyperlinked text. The desktop application installer will then download to your computer.
- Open the installer file. The setup wizard and a license agreement will appear.
- Accept the terms to the License Agreement.
- Click the Next button to continue the installer.
- Go back to the extension welcome email.
- Click on the attached configuration file. The configuration file will open and apply to the desktop application.

Once the configuration file has been opened and applied, the desktop application will be ready to use.
Registration Failed?
If you are seeing a registration failed message on your softphone, please refer to our Registration Failed Softphone Error article to help troubleshoot.