
- Old KB
- Nucleus for Microsoft Teams
- Troubleshooting and Common Issues
-
1Stream Platform
- Admin User Functions
- Application Download
- AutoTask Integration
- BrightGauge
- Call Routing Features
- Call Tools
- ConnectWise Integration
- CrewHu
- CRM Management
- DropBox Integration
- End User Management
- Enterprise Portal
- HubSpot Integration
- Freshdesk Integration
- General Troubleshooting
- Hudu
- InfusionSoft Integration
- Insightly
- Liongard Integration
- Kaseya BMS
- MSPbots Integration
- OneDrive Integration
- Power BI
- Progressive Dialer
- Reports
- Salesforce
- ServiceNow Integration
- Signal
- SyncroMSP
- ZenDesk Integration
- Halo Integration
- Transcription and Analytics
-
Control Portal
- Auto Attendant Functionality
- BLF Keys
- bvoip Fundamentals
- Call Flow
- Call Queue
- Call Recordings
- Call Rules
- Desktop Application User Documentation
- Dial Codes
- DIDs
- Extensions
- Extension Tools
- FAQs
- Google Integration
- Microsoft 365
- Multifactor Authentication
- Phone Hours
- Settings
- Security
- Shop
- SIP Trunks
- SIPTrunk.com Partnership
- Storage
- System Notifications
- System Tools
- Troubleshooting Guides
- Users
- Webclient User Documentation
- Whitelabelling
- Zoho Integration
- WhatsApp Integration
-
Device Management & Provisioning
-
Nucleus for Microsoft Teams
-
1Stream Client
-
Messaging
Setting up Teams Voicemail
This article will provide insight on how to enable Teams voicemail to use with the Teams Integration.
Action Notice
This step can be done at the time that the users are being added for the Teams Integration, or later on if you haven't decided yet.
Activating Teams Voicemail
- Log into the bvoip phone system.
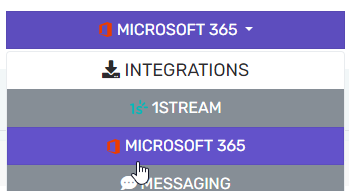
- Go to the Integrations > Microsoft 365 menu.
- Scroll down to the User list under the Synchronization section.
- Click on the No checkbox in the Use Microsoft Teams Voicemail Storage column for each user. The check box will turn into a Yes checkbox when selected.

- Run the scripts as shown in our Running the Teams Activation Scripts article.
- Ensure that each extension set for Teams Voicemail is set to Accept multiple calls under the Forwarding rules tab of the extension.
- You can go to Bulk management > Bulk edit to change this for multiple extensions at once.
Already Ran the Scripts?
If you ran the scripts when activating users and are coming back to add voicemail functionality to the users, the Activate New User script will be the only script that will need to be re-ran.
Voicemail Not Showing After Activation?
If the voicemail is not showing on Teams, we will need to make sure that the voicemails is active in the dial plan.
- Go to the Microsoft 365 Teams Admin Center.
- Go to Voice> Calling policies.
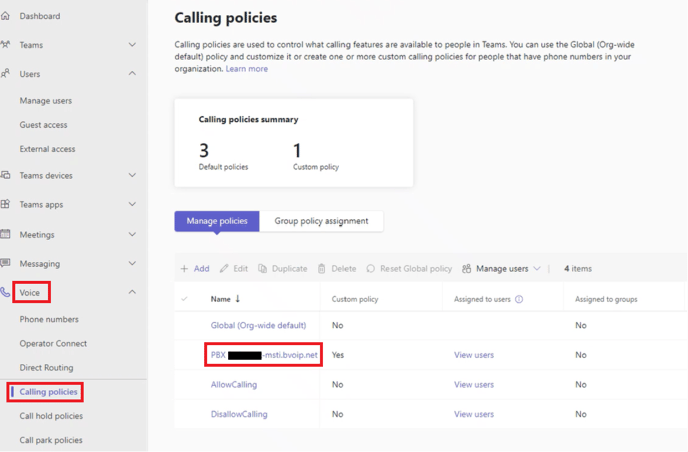
- Select PBX <company ID>-msti.bvoip.net Calling Policy.
- Scroll down to the Voicemail for Inbound Calls option.
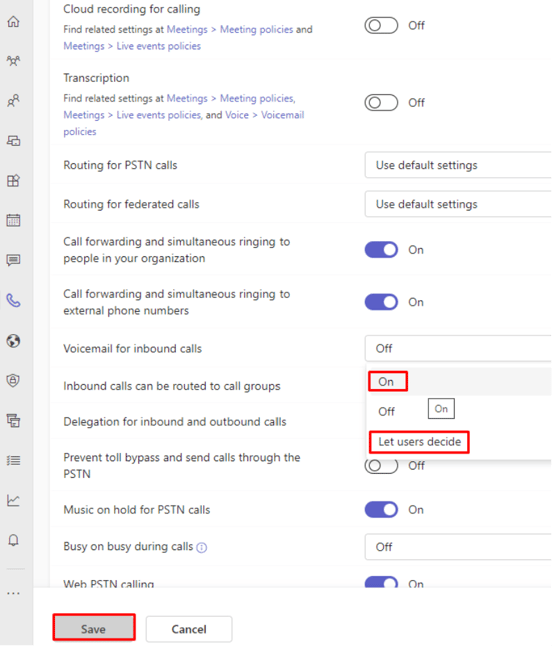
- In the drop-down, select one of the following options:
- On
- Let Users Decide
- Click on the Save button.
- If that still isn't working, ensure that each extension set for Teams Voicemail is set to Accept multiple calls under the Forwarding rules tab of the extension.
- You can go to Bulk management > Bulk edit to change this for multiple extensions at once.