
This article will walk through setting up and validating the required domain for use in the Teams integration
Access Requirements
To complete this integration successfully, you will need a Global Administrator account in Microsoft 365.
Licensing Requirements
Users with a license less than Microsoft 365 E5 will need to make sure that they have the Microsoft Teams Phone Standard license included for Teams to work as a softphone.
Licenses that will not work for the Teams Integration are:
- Microsoft 365 Domestic Calling Plan
- Skype for Business Online
Activating the Microsoft 365 Integration
If you have not already done so, you must follow the document linked below in order to first connect the phone system to Microsoft 365. This is a separate task from enabling SSO for the login portal.
Activating the Microsoft 365 Integration
Setup the Domain
- Log into the bvoip phone system.
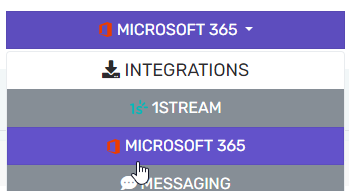
- Go to the Integrations menu and select Microsoft 365 from the dropdown.
- Go to the Direct Routing tab
- Check the Enable Microsoft Teams direct routing checkbox

- You'll be prompted to restart the phone services, click Yes
Note: This will end any active calls, so ensure no calls are in progress
- Wait 30-60 seconds for that to complete and the console to become responsive again, you'll get this pop-up in the top right when this happens.

- Under the Domain Status section click the Setup domain button

- Again wait 30-60 seconds for the command to complete, after which it will prompt you to verify your domain in the portal

Verify the Domain
- Login to your Microsoft 365 Admin center
- If you have Show all on the left hand navigation bar click on it

- Go to Settings > Domains

- Open the company-msti.bvoip.net domain shown

- Click Start setup in the top left

- Leave the option as Add a TXT record to the domain's DNS records and click Continue

- Click Verify
Note: If it returns an error here, give it 3-4 minutes and try again. The DNS record is automatically created.
- Click Continue

- Uncheck the box shown for Exchange and Exchange Online Protection, then click Continue

- Once you get Domain setup is complete you can close this window

Verify in the bvoip panel
- Back in the phone system go to Integrations > Microsoft 365 > Direct Routing
- Click on Check domain

- It should change to Verified and you're all set on this part

Next Steps for the Teams Integration
Once this has been completed, it will be time to add an integration user and your desired actual users. Please see our article Integration User Setup and Adding Users on how to continue this process.
Adding Users Notice
If you have not added your Teams users as extensions in the bvoip phone system, the Teams users will be be created starting on extension number 100. If you want an extension user to have a set extension, the extension will need to be built in the bvoip phone system prior to adding the users from Teams.