This article will provide a walkthrough on how to setup 911 and other Emergency Numbers inside of the bvoip phone system.
Why Setup an Emergency Number?
Emergency Numbers need to be setup prior to the use of the Phone System to ensure that in the case of emergencies, they can be used. If not setup properly within the the bvoip phone system, Emergency calls will not function as needed in an emergency situation.
As emergency numbers can vary for every client and their locations, the bvoip phone system allows the ability to customize the emergency numbers for locations as desired.
Emergency Number Notice
This article reflects the US Emergency Number, 911. However, 988 and the other respective emergency numbers also can be used accordingly based on your location.
Single Emergency Number Setup
This setup is best for clients that have a single office or multiple offices in the same country.
- Log into the bvoip phone system.
- Click on the Dashboard drop-down menu.
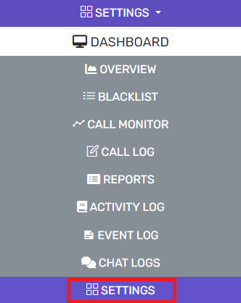
- Go to the Settings subsection.
- Select the General box.

- Scroll down to the Emergency Numbers section.
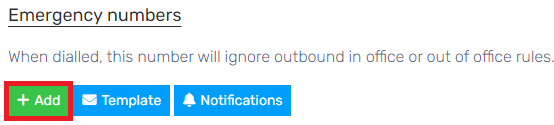
- Click the Add button.
- Name the rule and enter the number of the Emergency Phone number in your area, this will vary by country and region. The below example uses 911.
- Select the needed SIP Trunk to be used in the Route 1 drop-down.

- In the Prepend field, add a prepending digit value, if desired.
- In the Outbound Caller ID field, input the desired call back number for 911. If you are setting an e911 Number, input that number in this field.
- Click the Save button.

- Click Save on the main page.

Editing an Existing Emergency Number
To edit an existing Emergency Number, click the edit button next to the Emergency Number in question.
Multiple Emergency Number Setup
In order to setup emergency services for office locations that are not in the same country, it is recommended that Group Extensions are created beforehand to make the emergency number assignment easier.
If you have not created an extension group, please refer to our Creating Group Extensions article.
- Log into the bvoip phone system.
- Click on the Dashboard drop-down menu.
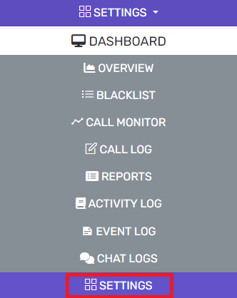
- Go to the Settings subsection.
- Select the General box.
- Scroll down to the Emergency Numbers section.
- Click the Add button.
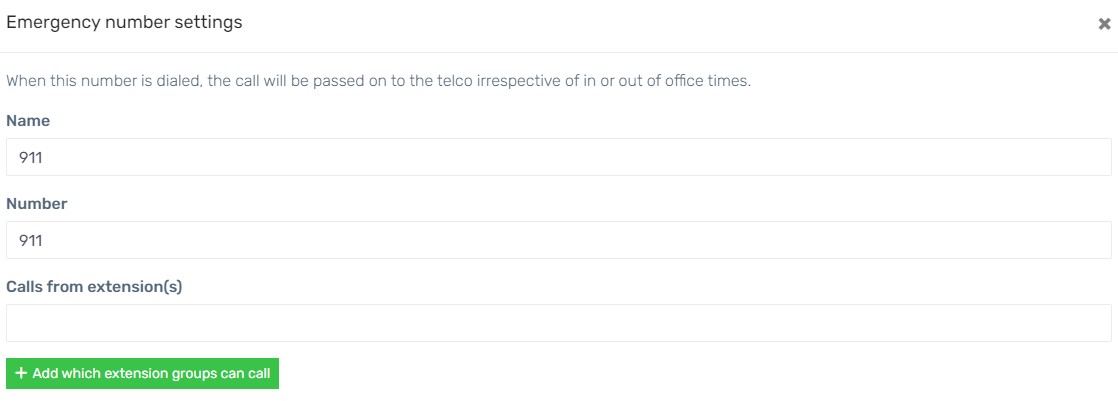
- Name the rule and enter the number of the Emergency Phone number in the desired area, this will vary by country and region. The below example uses 911.
- In the Calls from Extension(s) field, input the applicable extensions that would apply to this specific emergency number as an alternative to extension groups if desired.
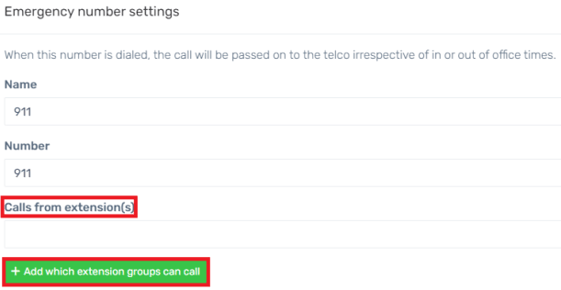
- In the Calls from extension group(s) section, click the Add button. A pop-up window will appear to add the extension groups that would apply to this specific emergency number.
- Select the desired extension group by clicking on the plus button.
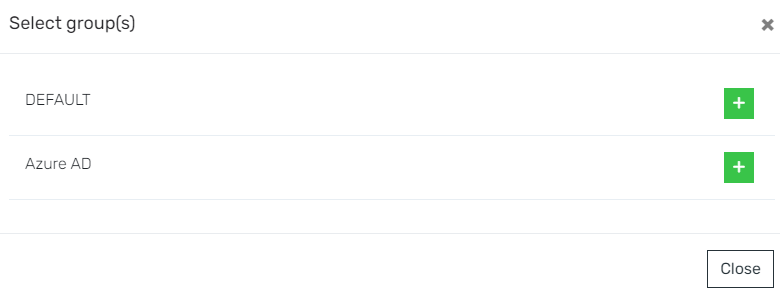
- Select the desired extension group by clicking on the plus button.
- Select the needed SIP Trunk to be used in the Route 1 drop-down.

- In the Prepend field, add a prepending digit value, if desired.
- In the Outbound Caller ID field, input the desired call back number for 911. If you are setting an e911 Number, input that number in this field.
- Click the Save button.

- Click Save on the main page.