
- Old KB
- 1Stream Platform
- Reports
-
1Stream Platform
- Admin User Functions
- Application Download
- AutoTask Integration
- BrightGauge
- Call Routing Features
- Call Tools
- ConnectWise Integration
- CrewHu
- CRM Management
- DropBox Integration
- End User Management
- Enterprise Portal
- HubSpot Integration
- Freshdesk Integration
- General Troubleshooting
- Hudu
- InfusionSoft Integration
- Insightly
- Liongard Integration
- Kaseya BMS
- MSPbots Integration
- OneDrive Integration
- Power BI
- Progressive Dialer
- Reports
- Salesforce
- ServiceNow Integration
- Signal
- SyncroMSP
- ZenDesk Integration
- Halo Integration
- Transcription and Analytics
-
Control Portal
- Auto Attendant Functionality
- BLF Keys
- bvoip Fundamentals
- Call Flow
- Call Queue
- Call Recordings
- Call Rules
- Desktop Application User Documentation
- Dial Codes
- DIDs
- Extensions
- Extension Tools
- FAQs
- Google Integration
- Microsoft 365
- Multifactor Authentication
- Phone Hours
- Settings
- Security
- Shop
- SIP Trunks
- SIPTrunk.com Partnership
- Storage
- System Notifications
- System Tools
- Troubleshooting Guides
- Users
- Webclient User Documentation
- Whitelabelling
- Zoho Integration
- WhatsApp Integration
-
Device Management & Provisioning
-
Nucleus for Microsoft Teams
-
1Stream Client
-
Messaging
How to Schedule Reports in 1Stream
This article will provide a walkthrough on how to schedule reports in 1Stream.
Just Need to Pull a Report
If you just need to pull a report that is not scheduled, please refer to our How to Pull Reports in 1Stream article.
How to Schedule a Report
- Log into the 1Stream portal.

- Click on the Reports icon. A drop-down menu will appear with the available reports.
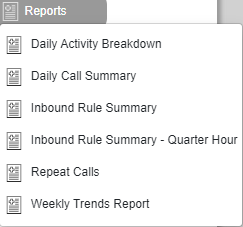
- Select the desired report. A pop-up will appear with the report's name and visual data, if available.
- Adjust the Date Range as desired.
- If the date was adjusted, click on the angle button to search the new dates.

- If the date was adjusted, click on the angle button to search the new dates.
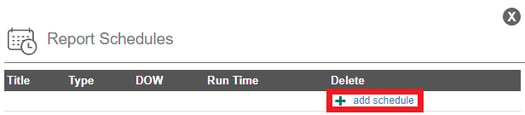
- Click on the Calendar icon to schedule the report. The Report Schedules pop-up will appear.

- Click on the Add Schedule button. The screen will refresh.
- In the Title field, name the scheduled report's name.
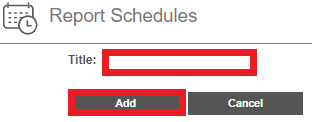
- Click the Add button. The Screen will refresh.
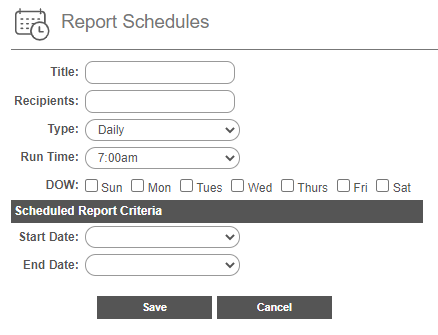
- In the Recipients field, input the desired recipients' email addresses.
- In the Type drop-down, select the desired option.
- In the Run Time field, select the desired time for the report to run.
- In the DOW section, select the desired days of week for the report to be ran on.
- In the Start Date drop-down, select the desired start date for the scheduling to start.
- In the End Date drop-down, select the desired end date for the scheduling to start.
- Click the Save button.
Want Additional Reporting?
For additional reporting, we offer the following options:
If you are not seeing the desired sort of reports, please reach out to our support team with your request or submit an idea request.