
- Old KB
- Control Portal
- SIPTrunk.com Partnership
-
1Stream Platform
- Admin User Functions
- Application Download
- AutoTask Integration
- BrightGauge
- Call Routing Features
- Call Tools
- ConnectWise Integration
- CrewHu
- CRM Management
- DropBox Integration
- End User Management
- Enterprise Portal
- HubSpot Integration
- Freshdesk Integration
- General Troubleshooting
- Hudu
- InfusionSoft Integration
- Insightly
- Liongard Integration
- Kaseya BMS
- MSPbots Integration
- OneDrive Integration
- Power BI
- Progressive Dialer
- Reports
- Salesforce
- ServiceNow Integration
- Signal
- SyncroMSP
- ZenDesk Integration
- Halo Integration
- Transcription and Analytics
-
Control Portal
- Auto Attendant Functionality
- BLF Keys
- bvoip Fundamentals
- Call Flow
- Call Queue
- Call Recordings
- Call Rules
- Desktop Application User Documentation
- Dial Codes
- DIDs
- Extensions
- Extension Tools
- FAQs
- Google Integration
- Microsoft 365
- Multifactor Authentication
- Phone Hours
- Settings
- Security
- Shop
- SIP Trunks
- SIPTrunk.com Partnership
- Storage
- System Notifications
- System Tools
- Troubleshooting Guides
- Users
- Webclient User Documentation
- Whitelabelling
- Zoho Integration
- WhatsApp Integration
-
Device Management & Provisioning
-
Nucleus for Microsoft Teams
-
1Stream Client
-
Messaging
How to Change the Billing Details in SIPTrunk.com
This article will provide a walkthrough on how to change the billing details in the SIPTrunk.com portal.
Why Change Billing Details
It is important that the billing details and contact on the SIPTrunk.com account be upto date as a security measure.
How to Make the Change on Main Account
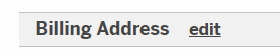
- Log into your SIPTrunk account. Under the General tab, your billing details will be displayed.
- Click on the Edit bolded text. The page will refresh to where it will be editable.
- Make the needed changes.
- Click on the Submit button.
How to Make the Change on Customer Account
- Log into your SIPTrunk account.
- Go to the Customers side menu.
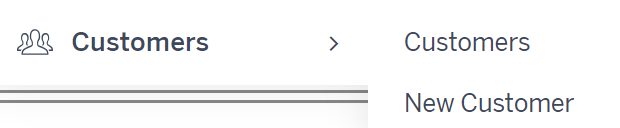
- Select the Customers sub-menu option.
- Click on the ID for the customer needing the edit.
- Click on the Edit bolded text. The page will refresh to where it will be editable.
- Make the needed changes.
- Click on the Submit button.