This article will provide a walkthrough on provisioning FXS/DECT devices in the bvoip phone system.
Not Using a FXS/DECT Device?
If you are not using this type of device, please refer to our Phone Provisioning General Setup article for instructions on how to properly provision your chosen device.
Provisioning FXS/DECT Devices
- Log into the bvoip phone system.
- Click on the Extensions drop-down menu.
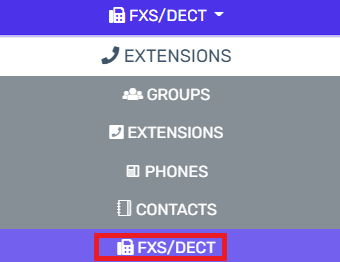
- Go to the FXS/DECT subsection.
- Select the Add FXS/DECT button. The "Add FXS/DECT" pop-up will appear.

- In the Select Brand drop-down, choose the manufacturer of the device.
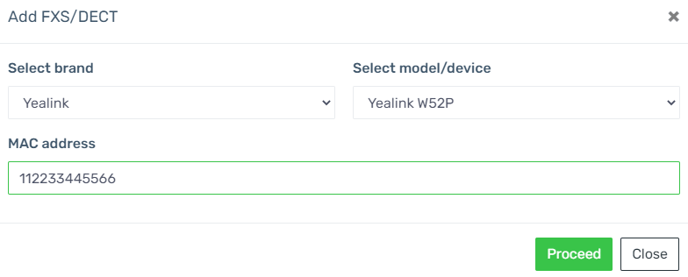
- In the Select Model/Device drop-down, choose the Make and Model of the device.
- In the MAC Address field, input the MAC address of the device.
- Click on the Proceed button. The pop-up window will close and the FXS/DECT Details screen will appear.
- Go to the Extension tab.
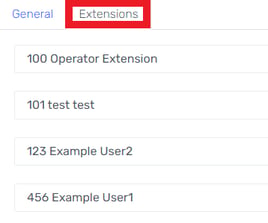
- In each of the desired drop-downs, select the desired extensions to be attached to this device.
- Click the Save button.
The extensions that these models are assigned to will not be reflected under their assigned extensions, but rather, at the FXS/DECT section.
Auto Provisioning the Base Station
Now that it is setup in the control portal we need to auto provision the base station so it is connected.
- Login to the base station via the IP address it has obtained
- Go to the section of the UI to enter the auto provisioning link, this varies by manufacturer and could be in settings>auto provision (YEALINK) or servicing>provisioning (SNOM)
- Enter in the auto provisioning link, click confirm and then auto provision now. This should provision and restart the base station.
Register Handsets
Now that the base station is setup in control and provisioned the final step is to register the wireless handsets to the base station.
- Grab the handset and press OK
- Select Register Handset
- Select the base station for the handset
- Press OK and enter the PIN 0000 (default)
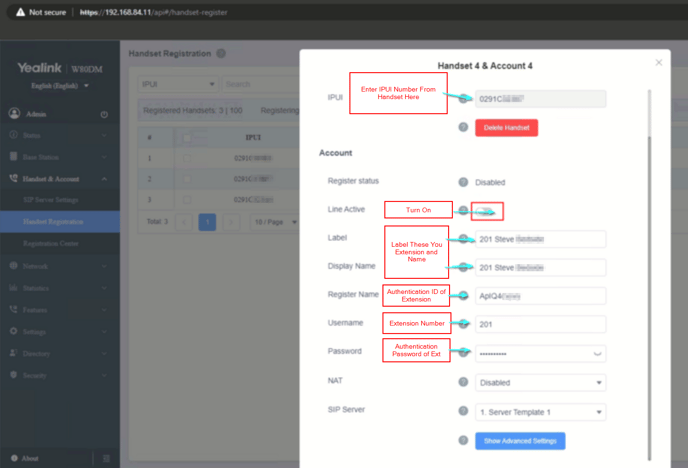
Issues Adding a handset? If you need to manually add the handset because the easy registration isn't working then you can enter it from the base station web UI. After logging into it do the following:
- Go to Handset&Account>Handset Registration or wherever the handset registration is found (Varies by manufacturer and firmware version)
- Add Handset and enter in the details for it as seen in the screenshot below: