
- Old KB
- 1Stream Platform
- CRM Management
-
1Stream Platform
- Admin User Functions
- Application Download
- AutoTask Integration
- BrightGauge
- Call Routing Features
- Call Tools
- ConnectWise Integration
- CrewHu
- CRM Management
- DropBox Integration
- End User Management
- Enterprise Portal
- HubSpot Integration
- Freshdesk Integration
- General Troubleshooting
- Hudu
- InfusionSoft Integration
- Insightly
- Liongard Integration
- Kaseya BMS
- MSPbots Integration
- OneDrive Integration
- Power BI
- Progressive Dialer
- Reports
- Salesforce
- ServiceNow Integration
- Signal
- SyncroMSP
- ZenDesk Integration
- Halo Integration
- Transcription and Analytics
-
Control Portal
- Auto Attendant Functionality
- BLF Keys
- bvoip Fundamentals
- Call Flow
- Call Queue
- Call Recordings
- Call Rules
- Desktop Application User Documentation
- Dial Codes
- DIDs
- Extensions
- Extension Tools
- FAQs
- Google Integration
- Microsoft 365
- Multifactor Authentication
- Phone Hours
- Settings
- Security
- Shop
- SIP Trunks
- SIPTrunk.com Partnership
- Storage
- System Notifications
- System Tools
- Troubleshooting Guides
- Users
- Webclient User Documentation
- Whitelabelling
- Zoho Integration
- WhatsApp Integration
-
Device Management & Provisioning
-
Nucleus for Microsoft Teams
-
1Stream Client
-
Messaging
Managing CRM Boards
This article will provide a walkthrough on adjusting the displayed fields for CRM ticket creation in the 1Stream platform.
What is a CRM List?
A CRM List is a list of boards and sub boards that will be pulled from the connected CRM integrations with your 1Stream instance.
Editing these Lists will edit the access to what CRM data that your 1Stream Desktop Application users will see when selecting drop-down options in the ticket fields when creating or modifying tickets in the 1Stream Desktop Application.
CRM User Permissions
CRM based user permissions do not filter over from connected CRMs and the fields altered in 1Stream will be for all of your users in 1Stream. CRM List editing can not be adjusted on a per user basis.
How to Edit CRM Lists
- Log into the 1Stream Portal.
- Go to the Administration menu.

- Choose the Manage Organization option. The page will refresh.
- Scroll down to the Connected Account and CRM Settings section.
- Click on the CRM Name. The Modify CRM Settings pop-up will appear.
- Scroll down to the Manage CRM Lists section.
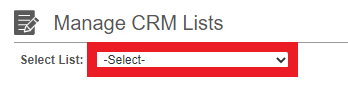
- In the Select List drop-down, select the desired list. The list items will appear.
- Select/Deselect the items that are desired.

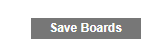
- Click the Save button. The save button text will change based on what CRM List that is selected.
Seeing Incorrect Board Details?
If you are seeing incorrect board details, be sure that the board is made available with the instructions above. If they are still incorrect, please click on the refresh list data button as shown below.
