-
1Stream Platform
- Admin User Functions
- Application Download
- AutoTask Integration
- BrightGauge
- Call Routing Features
- Call Tools
- ConnectWise Integration
- CrewHu
- CRM Management
- DropBox Integration
- End User Management
- Enterprise Portal
- HubSpot Integration
- Freshdesk Integration
- General Troubleshooting
- Hudu
- InfusionSoft Integration
- Insightly
- Liongard Integration
- Kaseya BMS
- MSPbots Integration
- OneDrive Integration
- Power BI
- Progressive Dialer
- Reports
- Salesforce
- ServiceNow Integration
- Signal
- SyncroMSP
- ZenDesk Integration
- Halo Integration
- Transcription and Analytics
-
Control Portal
- Auto Attendant Functionality
- BLF Keys
- bvoip Fundamentals
- Call Flow
- Call Queue
- Call Recordings
- Call Rules
- Desktop Application User Documentation
- Dial Codes
- DIDs
- Extensions
- Extension Tools
- FAQs
- Google Integration
- Microsoft 365
- Multifactor Authentication
- Phone Hours
- Settings
- Security
- Shop
- SIP Trunks
- SIPTrunk.com Partnership
- Storage
- System Notifications
- System Tools
- Troubleshooting Guides
- Users
- Webclient User Documentation
- Whitelabelling
- Zoho Integration
- WhatsApp Integration
-
Device Management & Provisioning
-
Nucleus for Microsoft Teams
-
1Stream Client
-
Messaging
Creating a Contact in Textable
This article will provide a walkthrough on creating contacts in Textable.
There are three ways to add contacts in Textable:
Existing Conversation
- Log into Textable.
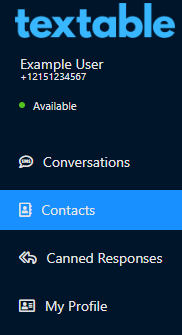
- Go to the Contacts menu.
- Select the Conversation that you wish to add a contact from. A second part of the screen will load, allowing the contact details to be edited.
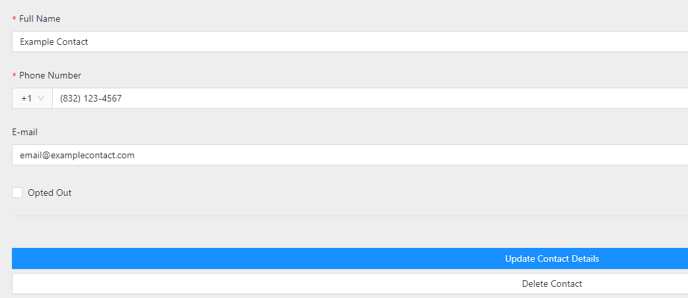
- Click on the Update Contact Details button once done.
New Contact with No Conversation
- Log into Textable.
- Click on the New Contact button. The Add New Contact pop-up will appear, allowing you to build out the contact in full.

- Add in the desired Contact details.
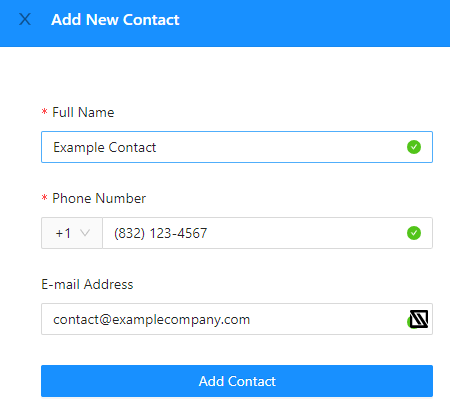
- Click on the Add Contact button once done.
CSV File Upload
- Log into Textable.
- Click on the Import button. The Import Contacts pop-up will appear. There will be an option to upload the CSV file from the Device or Add the Data from the CSV file into a field.

- If selecting the to Upload the CSV file from your Device, click on the section to expand.
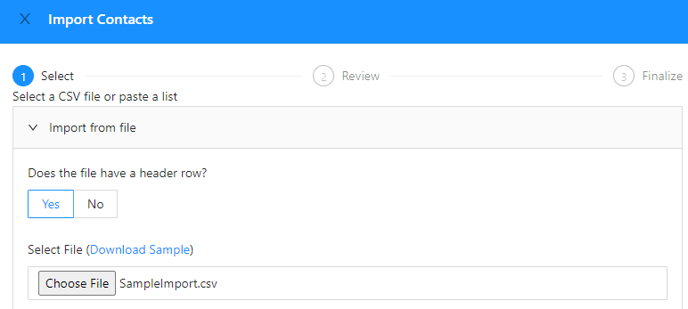
- Select Yes or No for the Does the file have a header row question.
- Import the File from your Local device.
- If selecting the Add Data f rom CSV file option, click on the section to expand.
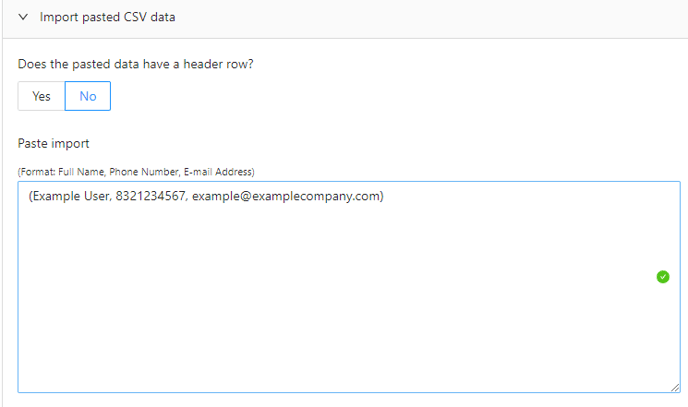
- Select Yes or No for the Does the file have a header row question.
- Input the data as provided in the example.
- If selecting the to Upload the CSV file from your Device, click on the section to expand.
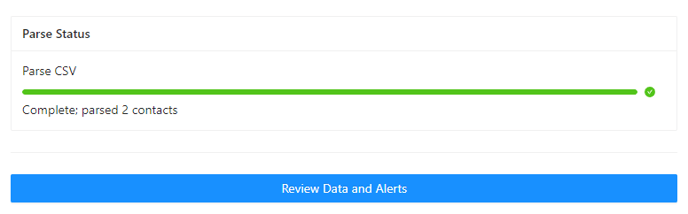
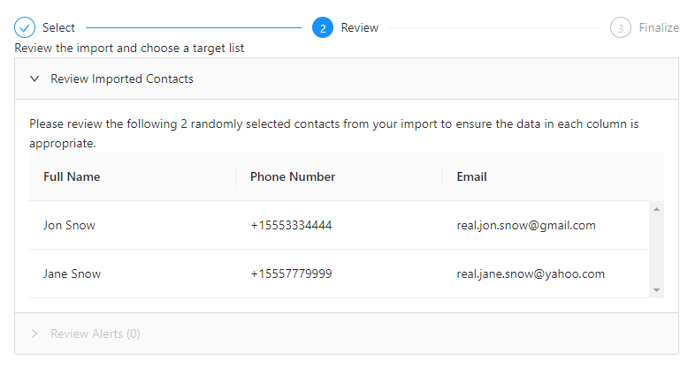
- Click on the Review Data and Alerts button. The next page will appear where the imported contacts can be reviewed.
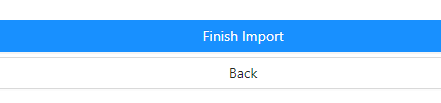
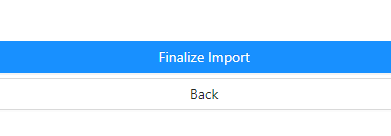
- Click on the Finalize Import button once confirming that the contacts are correct.
- The next page will show confirmation of the contacts added, edited and to which number.
- Click on the Finish Import button.