- Old KB
- Control Portal
- Storage
-
1Stream Platform
- Admin User Functions
- Application Download
- AutoTask Integration
- BrightGauge
- Call Routing Features
- Call Tools
- ConnectWise Integration
- CrewHu
- CRM Management
- DropBox Integration
- End User Management
- Enterprise Portal
- HubSpot Integration
- Freshdesk Integration
- General Troubleshooting
- Hudu
- InfusionSoft Integration
- Insightly
- Liongard Integration
- Kaseya BMS
- MSPbots Integration
- OneDrive Integration
- Power BI
- Progressive Dialer
- Reports
- Salesforce
- ServiceNow Integration
- Signal
- SyncroMSP
- ZenDesk Integration
- Halo Integration
- Transcription and Analytics
-
Control Portal
- Auto Attendant Functionality
- BLF Keys
- bvoip Fundamentals
- Call Flow
- Call Queue
- Call Recordings
- Call Rules
- Desktop Application User Documentation
- Dial Codes
- DIDs
- Extensions
- Extension Tools
- FAQs
- Google Integration
- Microsoft 365
- Multifactor Authentication
- Phone Hours
- Settings
- Security
- Shop
- SIP Trunks
- SIPTrunk.com Partnership
- Storage
- System Notifications
- System Tools
- Troubleshooting Guides
- Users
- Webclient User Documentation
- Whitelabelling
- Zoho Integration
- WhatsApp Integration
-
Device Management & Provisioning
-
Nucleus for Microsoft Teams
-
1Stream Client
-
Messaging
Configuring SFTP Synchronizer Settings
This article will provide a walkthrough on connecting SFTP settings in the bvoip phone system.
SFTP Synchronizer Configuration
This article is intended to allow users to input the information for an FTP server where the instance can upload the recordings and voicemails to. Missing this successful connection can effect the access and saving recordings of calls and voicemails.
- Login to the bvoip phone system.
- Click on the Tools drop-down menu.
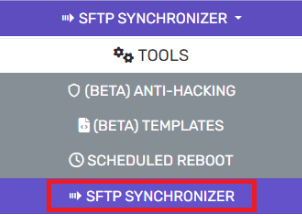
- Go to the SFTP Synchronizer subsection.

- Enter the required information for the SFTP Host, Port, Username and Password.
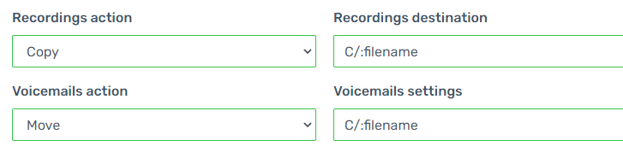
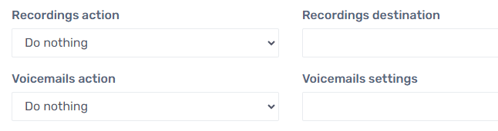
- Set the Recordings action:
- Do Nothing– No actions performed for the call recordings.
- Copy– A copy of the call recordings will be uploaded.
- Move– Recordings will be moved off the instance.
- Recordings destination – Desired folder on FTP server
- Voicemail Action and Destination – Same as above.
- Set the Recordings destination to the desired folder on the FTP server.
- Set the Voicemail Action.
- Set the Voicemail location to the desired folder on the FTP server.
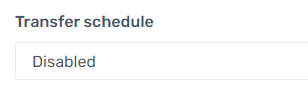
- Set the Transfer Schedule with how frequently data should be transferred over the FTP server.
- Click the Save button.
Note: The Recording and Voicemail Action settings will determine which folder the saved files are dropped into on the SFTP connection. In the below example the file names are being directed to C/:filename.
Depending on the Operating system, the file pathways will look a bit different. As long as the end directory on the SFTP is reachable, this will still function. The accessibility can be tested and verified using a basic FTP solution software, such as Filezilla.