
- Help Center
- Control Portal
- SIP Trunks
-
1Stream Platform
- Admin User Functions
- Application Download
- AutoTask Integration
- BrightGauge
- Call Routing Features
- Call Tools
- ConnectWise Integration
- CrewHu
- CRM Management
- DropBox Integration
- End User Management
- Enterprise Portal
- HubSpot Integration
- Freshdesk Integration
- General Troubleshooting
- Hudu
- InfusionSoft Integration
- Insightly
- Liongard Integration
- Kaseya BMS
- MSPbots Integration
- OneDrive Integration
- Power BI
- Progressive Dialer
- Reports
- Salesforce
- ServiceNow Integration
- Signal
- SyncroMSP
- ZenDesk Integration
- Halo Integration
- Transcription and Analytics
-
Control Portal
- Auto Attendant Functionality
- BLF Keys
- bvoip Fundamentals
- Call Flow
- Call Queue
- Call Recordings
- Call Rules
- Desktop Application User Documentation
- Dial Codes
- DIDs
- Extensions
- Extension Tools
- FAQs
- Google Integration
- Microsoft 365
- Multifactor Authentication
- Phone Hours
- Settings
- Security
- Shop
- SIP Trunks
- SIPTrunk.com Partnership
- Storage
- System Notifications
- System Tools
- Troubleshooting Guides
- Users
- Webclient User Documentation
- Whitelabelling
- Zoho Integration
- WhatsApp Integration
-
Device Management & Provisioning
-
Nucleus for Microsoft Teams
-
1Stream Client
-
Messaging
Adding New Phone Numbers
This article will provide a walkthrough on adding new phone numbers into the bvoip system after being setup.
Whether due to porting or just having a new phone number being purchased, sometimes new numbers are needed to be added into the bvoip phone system.
SIP Trunk Check
Before adding the numbers into the bvoip phone system, the first thing to keep in mind is if the phone number that is being added is associated with the current SIP Trunk provider. If not, a new SIP Trunk will need to be created.
For guidance on this, please refer to our Setting up SIP Trunks article.
Adding the DID to the SIP Trunk
If the phone number is being carried by the existing SIP Trunk provider, then the existing SIP Trunk in the phone system will need to be edited to include the new phone number.
- Log into the bvoip phone system.
- Click on the Call Flow drop-down menu.
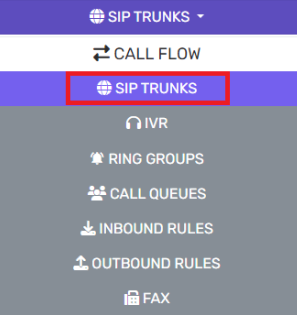
- Go to the SIP Trunks subsection.
- Select the pencil button to edit the desired SIP Trunk.
- Navigate to the DIDs tab.

- Click on the Add Single DID button. A blank field will appear.
- Add the new phone number into the blank field.
Note: Be sure to replace the 1 at the beginning of the phone number with an asterisk.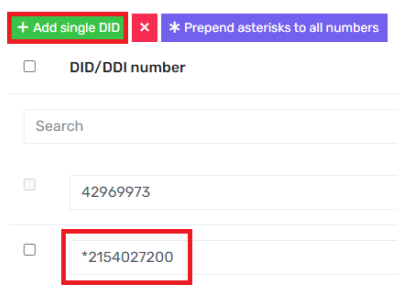
- Repeat as needed for each phone number to be added.
- Click the Save button.
After the phone number has been added to the SIP Trunk, the routing will need to be setup in Inbound Rules.
Adding the DID to the Inbound Rules
After the phone number has been added into the SIP Trunk, the phone number will then need to be added into Inbound Rules to setup the routing.
For Guidance on this, please refer to our Setting up Inbound Call Rules article.