- Old KB
- Device Management & Provisioning
- Unite Client
-
1Stream Platform
- Admin User Functions
- Application Download
- AutoTask Integration
- BrightGauge
- Call Routing Features
- Call Tools
- ConnectWise Integration
- CrewHu
- CRM Management
- DropBox Integration
- End User Management
- Enterprise Portal
- HubSpot Integration
- Freshdesk Integration
- General Troubleshooting
- Hudu
- InfusionSoft Integration
- Insightly
- Liongard Integration
- Kaseya BMS
- MSPbots Integration
- OneDrive Integration
- Power BI
- Progressive Dialer
- Reports
- Salesforce
- ServiceNow Integration
- Signal
- SyncroMSP
- ZenDesk Integration
- Halo Integration
- Transcription and Analytics
-
Control Portal
- Auto Attendant Functionality
- BLF Keys
- bvoip Fundamentals
- Call Flow
- Call Queue
- Call Recordings
- Call Rules
- Desktop Application User Documentation
- Dial Codes
- DIDs
- Extensions
- Extension Tools
- FAQs
- Google Integration
- Microsoft 365
- Multifactor Authentication
- Phone Hours
- Settings
- Security
- Shop
- SIP Trunks
- SIPTrunk.com Partnership
- Storage
- System Notifications
- System Tools
- Troubleshooting Guides
- Users
- Webclient User Documentation
- Whitelabelling
- Zoho Integration
- WhatsApp Integration
-
Device Management & Provisioning
-
Nucleus for Microsoft Teams
-
1Stream Client
-
Messaging
Accessing and Downloading the Unite Client in the Managed Provisioning Portal
This article will provide walkthrough on how to use the Unite software in the Managed Provisioning Portal.
Why Unite?
With the Unite tool, phones can be seen and controlled from one portal. Using the Unite application download, phones can be identified and added into the Managed Provisioning Portal automatically after scanning your network.
Unite Download Pro Tip
The Unite application should be downloaded on a server or computer that stays on the same network as the phones being managed.
Phone Compatibility Warning
Please note that certain phone makes and models are not compatible with the Unite Client and Managed Provisioning Portal. If you are unsure if you should be using either with your intended phone, please refer to the Hard Phone Provisioning article for the intended device or reach out to our Support team.
OS Compatibility Warning
Unite's downloadable application is only functional with Windows.
Accessing and Downloading the Unite Software
- Log into the Managed Provisioning Portal.
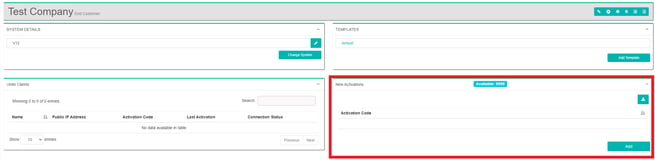
- Go to the Customers section.
- Locate and click on the desired client.
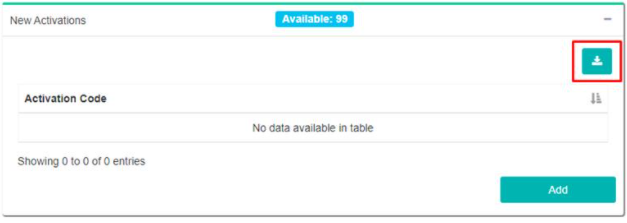
- Scroll down to the New Activations section.
- Click on the Download button.
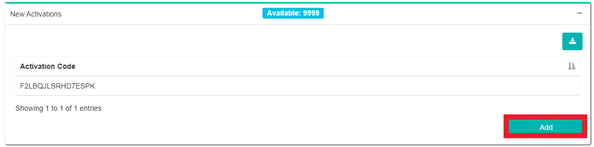
- Click on the Add button. The activation code will then be generated for use in the installation process.
- Once the application is downloaded, open the file to run the installer.
- Click the Next button in the Installer pop-up.
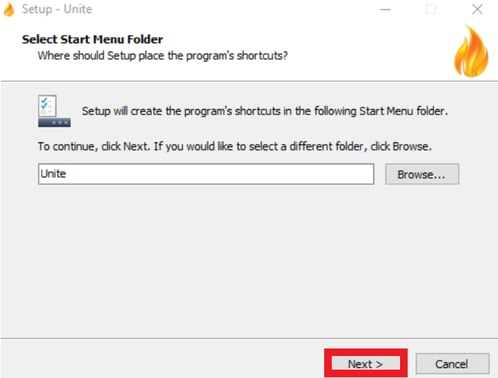
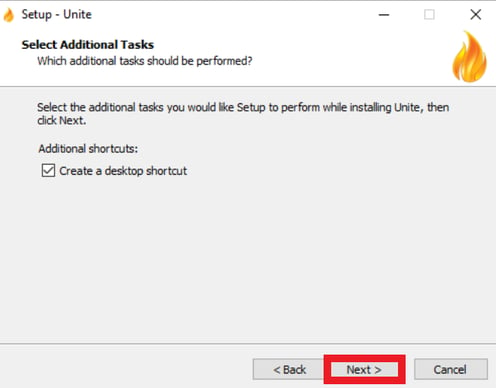
- Click the Next button again. The installer will now finish up and update the application.
- Click the Allow Access button in the Windows Defender pop-up that appears. A pop-up will appear asking for the Activation Code.
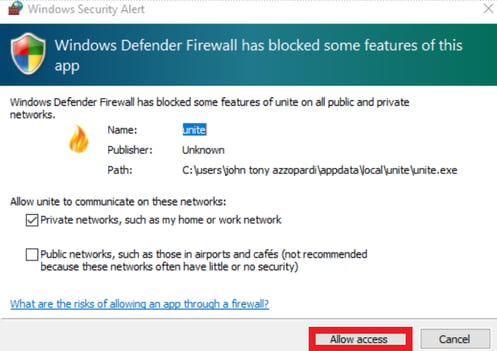
- In the Activation field, input the Activation Code generated on step 6.

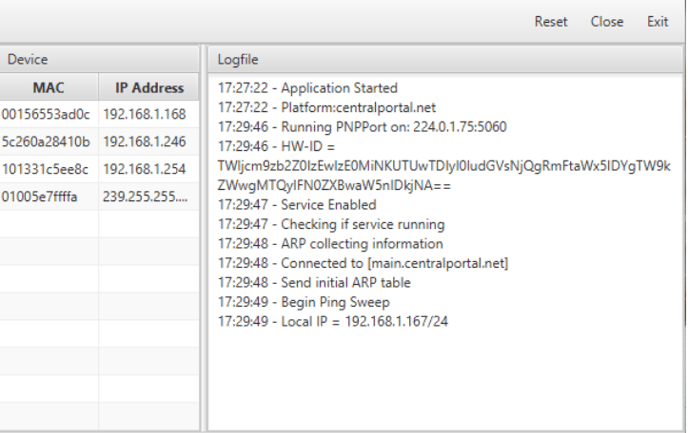
- Click the Login button. The application will then run, scanning the network for phones on the network and adding them into the Managed Provisioning Portal.